Create and edit ad extensions in Google Ads

1. Define your objectives and create a strategy before adding or editing ad extensions in your account.

Don’t haphazardly create ad extensions just to run them. Using the wrong ad extensions can cost you money without improving account performance.

2. Add a new extension to Google Ads by navigating to Ads & Extensions > Extensions, and clicking the + icon.

3. Select the type of ad extension you wish to create from the dropdown list.

Ad extensions “extend” your ad with additional information about your business. For example, if your goal is to get people to your brick and mortar store, you could consider using a Call extension to allow visitors to call the business or a Location extension to allow visitors to get driving directions. Create a messaging strategy before building out ad extensions to make sure your extensions support your business goals and don’t conflict with or repeat each other.

4.  Set the level of granularity to apply your ad extension and only use Ad group for extensions that are unique to the Ad group.

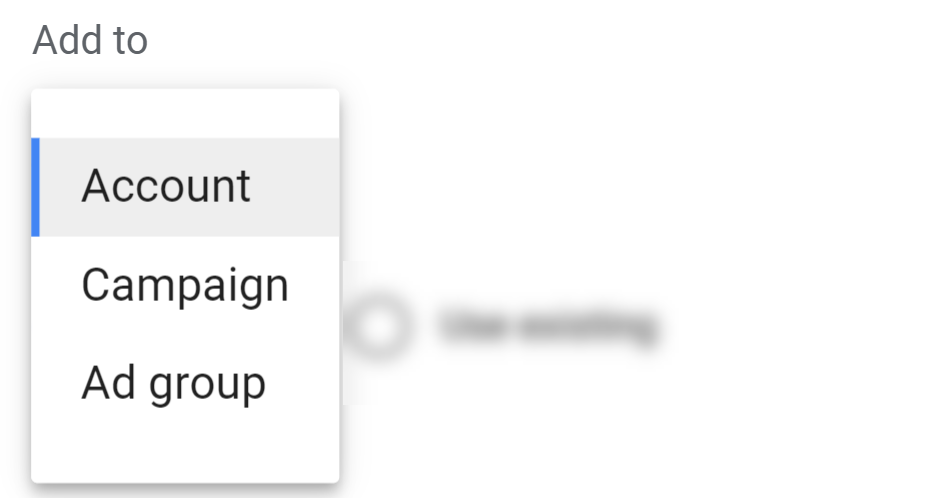
Most extensions have the option of Account, Campaign, or Ad group level. Applying an extension to an Ad group will override other global extensions. Refer to your ad extension messaging strategy for tips on when to use each level.

5. Enter your ad extension according to the prompts and pay close attention to character constraints.

6. Use Advanced Options if you want to create a schedule for your ad extension, then click Save.

You can set start and end dates for limited-time promotions, as well as days of the week and hours for your ad extension to run (you many want to only schedule call extensions during business hours). For promotion extensions, note that Display promotion dates does not control when your ad will run. You will still need to use Advanced Options to create an end date.

7. Review ad extension performance to identify what's working and what's not.

The Google Ads interface is deeply misleading when it comes to ad extension performance, so don’t skip this step!

8. Navigate to Ads & Extensions and select the ad extension you want to edit, make your edit, and choose where you want to apply it to.

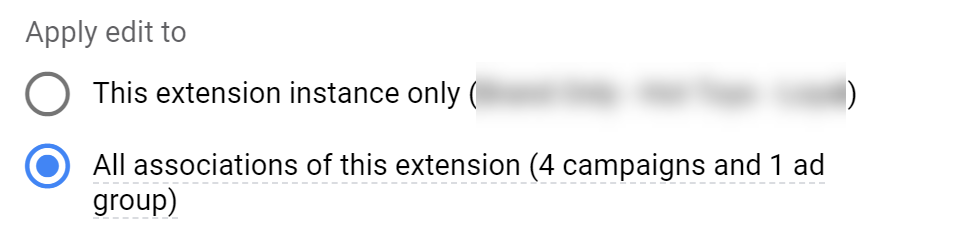
Select This extension instance only to apply it to a single instance if you just want it to apply to a specific ad group or campaign or All associations of this extension to apply it universally and click Save.

9. Remove unwanted automated extensions by selecting Advanced options from the three dots in the right corner, select your extensions and click the Turn off button.

Unlike manual extensions, you can’t edit automated extensions, but you can keep them from serving. Google requires you to select a reason before turning off an extension. Select your reason and add any additional comments.